Wasabi Surveillance Cloud – Download and Installation Instructions
Wasabi Surveillance Cloud – Download and Installation Instructions
Wasabi Surveillance Cloud is a new paid product offering which bundles the Wasabi Surveillance Cloud software and a Wasabi Surveillance Cloud storage account.
Latest version : 1.5.0.8 (Updated: 11/4/2022)
If you are an existing Wasabi Surveillance Cloud customer and would like to upgrade to the latest version shown above, please send an email to [email protected].
Installation
This article will walk you through the Wasabi Surveillance Cloud installation prerequisites and basic configuration steps.
Prerequisites
Minimum system requirements
- 64-bit Microsoft Windows® 7/Server 2008 R2/Windows® 8/Server 2012/Server 2012 R2/ Windows® 10/Server 2016/Server 2019/Server 2022
Important: Microsoft Windows® 7/Server 2008 R2 computers must run at least Service Pack 1 and have the KB976932 and the KB3033929 security updates installed.
- 4 GB of physical RAM (at least)
- 100 MB of available hard-disk space for installation (at least)
-
Microsoft .NET 4.8 Framework needs to be installed
Download & Installation
1. You can sign up for a Wasabi Surveillance Cloud 30 day 1TB free trial account at https://wasabi.com/sign-up-surveillance-cloud/.
2. Once you enter the necessary information and hit Submit on the sign up page, you will receive an email to complete the setup of your storage account (Subject line – Set Up Your Wasabi Free Trial Account).
3. Click on the Create Account link to be redirected to the Wasabi Console and set a password for your new WSC Storage account.
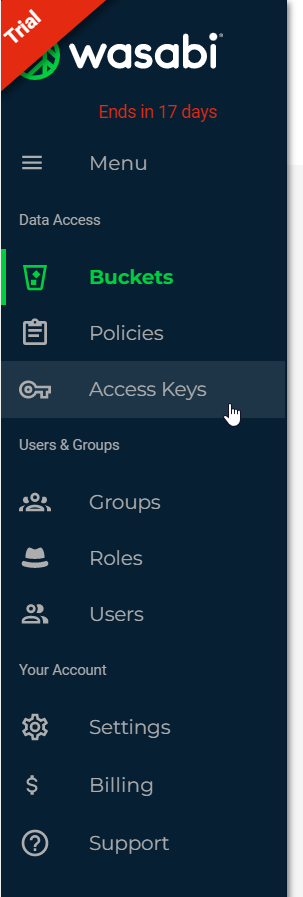
4. Now, you should click on Access Keys to generate a new pair of access key and secret key, which will be used on the WSC software to connect it to the storage account. Store the keys in a secure location.
5. Finally you will receive an email with a link to download the WSC software. Click on the link to download the software to your PC. Once the download is complete, begin the installation by running the Wasabi Surveillance Cloud installer file as Administrator.
6. Click ‘Next' to continue the installation

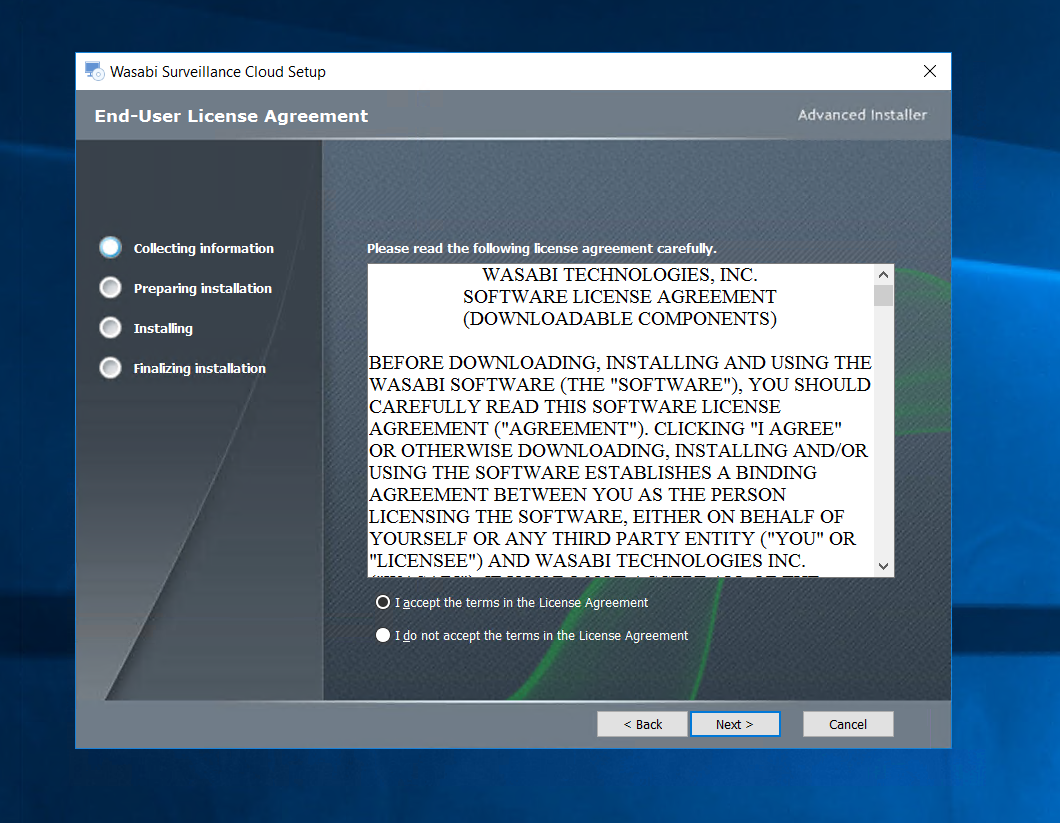
7. Click on the checkbox to agree to the License terms and conditions, and click Next.
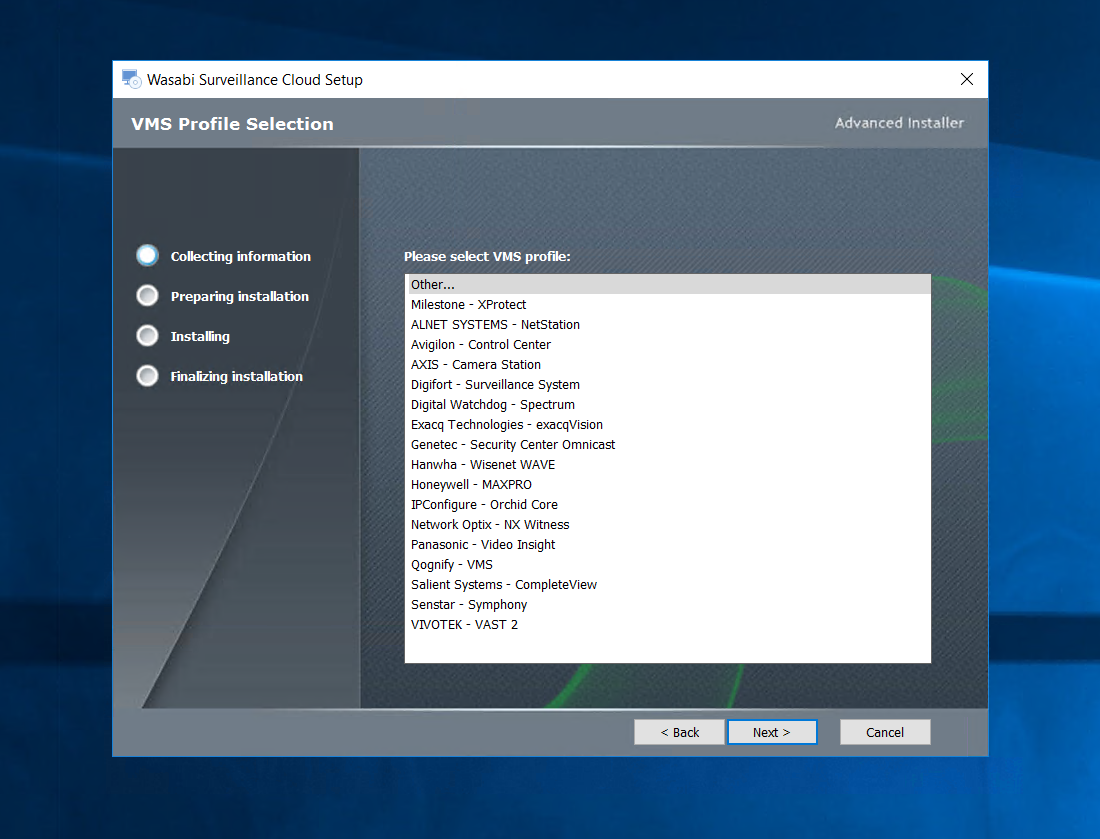
8. Select the appropriate VMS (Video Management System) you are using or plan to use from the list of profiles. If your VMS application is not listed here please select ‘Other'.
Important – For Milestone XProtect users, please select Milestone -XProtect to install the WSC plugin that integrates directly with Milestone.
This does not add/modify/delete any configuration on your VMS itself. This step only ensures the WSC software is optimized to work with your VMS application.
9. For Milestone XProtect VMS, the following components of WSC are available for installation. If your XProtect elements are installed on different machines, you will need to install WSC software on the appropriate server and choose the right application shown below.
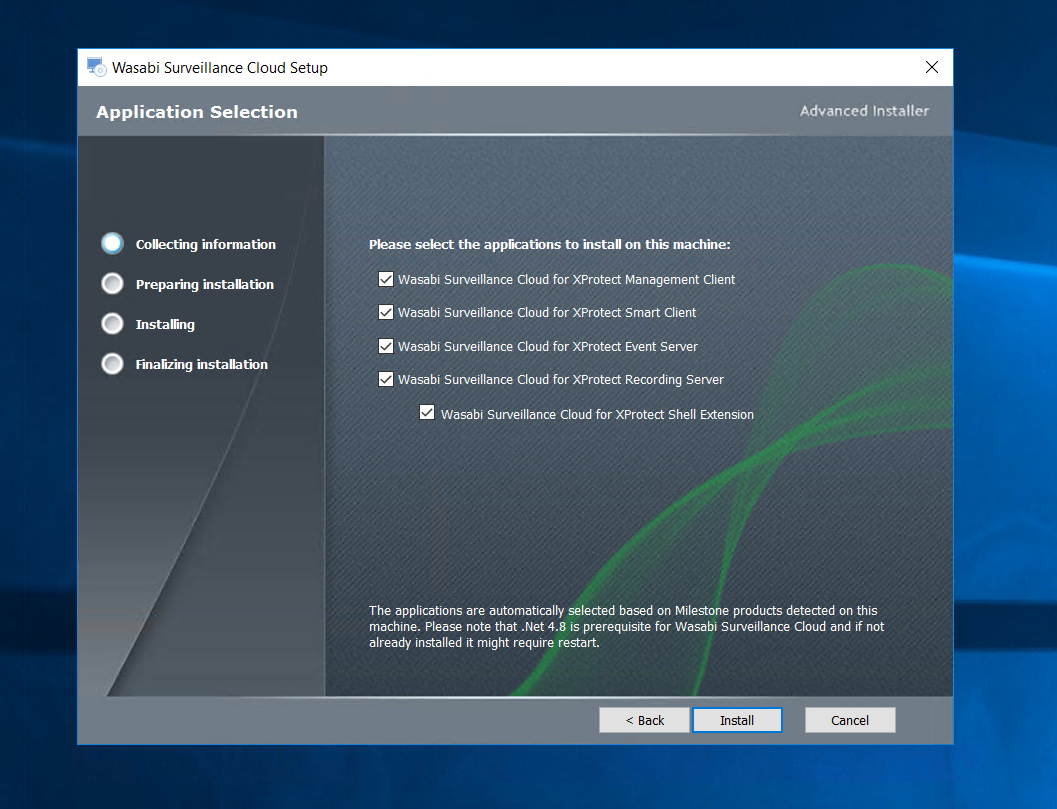
For all other VMS, the following components of WSC are available for installation.

Click Install to initiate installation.

10. Click on Finish once the installation is successfully completed.
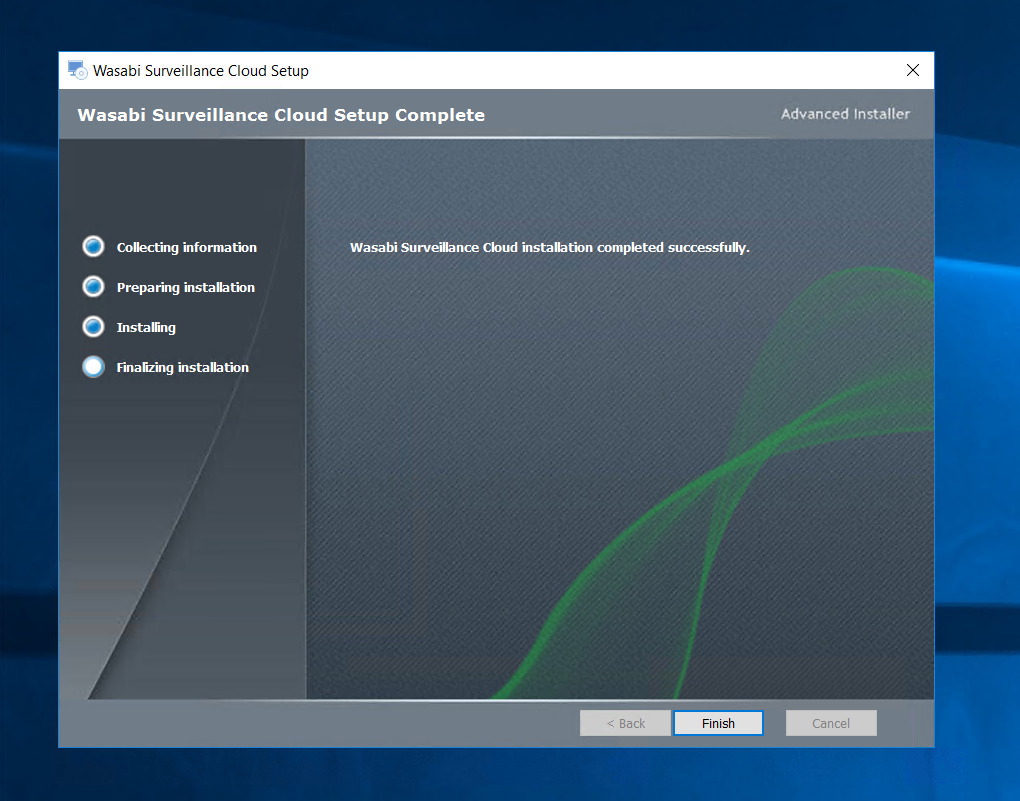
This completes the installation of Wasabi Surveillance Cloud.
Software Activation
For Milestone XProtect installations –
Wasabi Surveillance Cloud installs as a plugin within the Milestone XProtect application. Start the XProtect Management Client software, and once loaded you will notice Wasabi Surveillance Cloud in the Site Navigatio Menu at the bottom, see screenshot below –

Click on Administration to activate the software license. Enter your WSC Account Email address and Account ID, and hit OK.

If the license is successfully activated you will see the following information –

For Configuration instructions, please refer to the How do I use Milestone XProtect with Wasabi Surveillance Cloud Knowledge Base article.
For all other VMS installations –
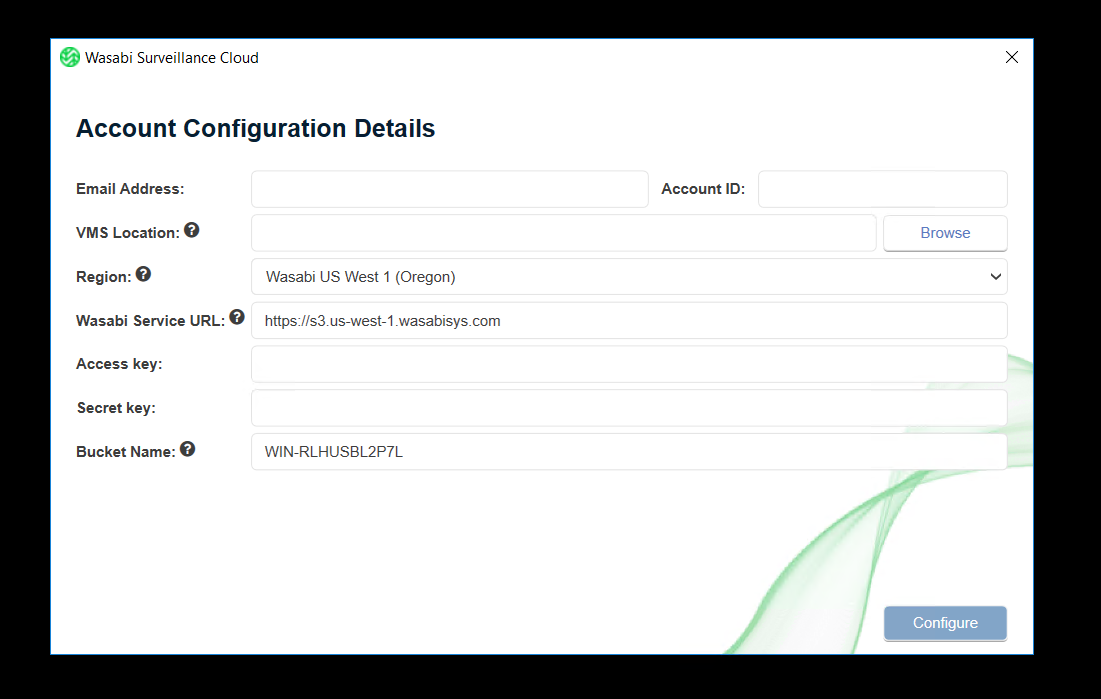
A Configuration Wizard window pops up after successful installation. This wizard helps with quick configuration of WSC so you can begin using the app instantly.
-
Email Address – Enter your WSC Account Email Address
-
Account ID – Enter your WSC Account ID
-
VMS Location – Click on Browse to navigate to your VMS recordings directory and select it. This will be set as the source which needs to be replicated to Wasabi.
-
Region – Select the appropriate region where the server is located
-
Wasabi Service URL – Based on the region selected above, the appropriate service URL is automatically selected.
-
Access Key – Paste your WSC Account access key here
-
Secret Key – Paste your WSC Secret key associated with the Access key here
-
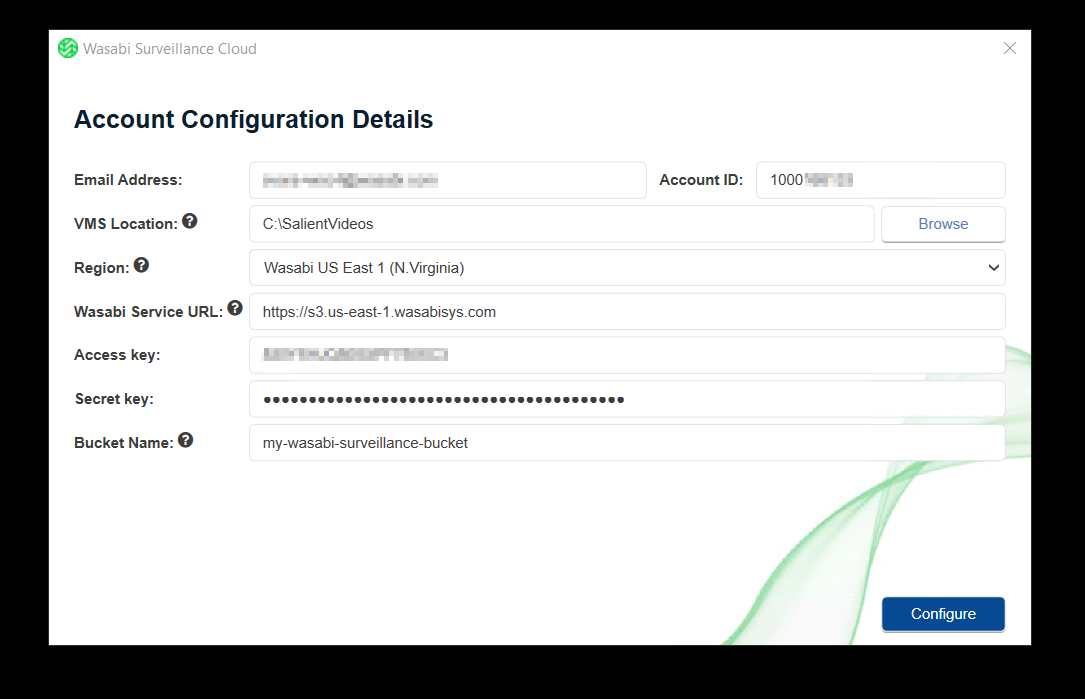
Bucket Name – A new bucket is created with the prepopulated name. You can change this to a different and unique bucket name. Please follow bucket naming conventions explained when you move the cursor around the question mark.
Once you have entered all the information, click Configure as shown below on the sample screenshot.
Finally, a Configuration Summary is displayed. Click Finish to close the Configuration Wizard
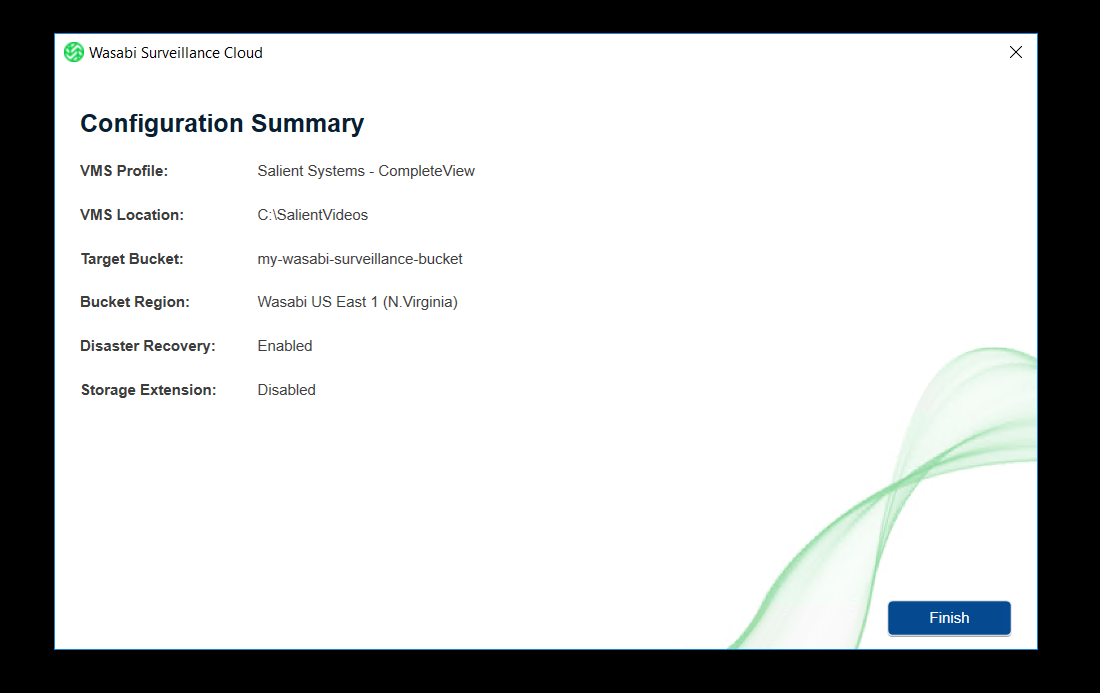
Wasabi Surveillance Cloud is now running and replicating data from the set source to your target Wasabi bucket.

the bucket
Wasabi Surveillance Cloud is a new paid product offering which bundles the Wasabi Surveillance Cloud software and a Wasabi Surveillance Cloud storage account.
Latest version : 1.5.0.8 (Updated: 11/4/2022)
If you are an existing Wasabi Surveillance Cloud customer and would like to upgrade to the latest version shown above, please send an email to [email protected].
Installation
This article will walk you through the Wasabi Surveillance Cloud installation prerequisites and basic configuration steps.
Prerequisites
Minimum system requirements
- 64-bit Microsoft Windows® 7/Server 2008 R2/Windows® 8/Server 2012/Server 2012 R2/ Windows® 10/Server 2016/Server 2019/Server 2022
Important: Microsoft Windows® 7/Server 2008 R2 computers must run at least Service Pack 1 and have the KB976932 and the KB3033929 security updates installed. - 4 GB of physical RAM (at least)
- 100 MB of available hard-disk space for installation (at least)
- Microsoft .NET 4.8 Framework needs to be installed
Download & Installation
1. You can sign up for a Wasabi Surveillance Cloud 30 day 1TB free trial account at https://wasabi.com/sign-up-surveillance-cloud/.
2. Once you enter the necessary information and hit Submit on the sign up page, you will receive an email to complete the setup of your storage account (Subject line – Set Up Your Wasabi Free Trial Account).
3. Click on the Create Account link to be redirected to the Wasabi Console and set a password for your new WSC Storage account.
4. Now, you should click on Access Keys to generate a new pair of access key and secret key, which will be used on the WSC software to connect it to the storage account. Store the keys in a secure location.
5. Finally you will receive an email with a link to download the WSC software. Click on the link to download the software to your PC. Once the download is complete, begin the installation by running the Wasabi Surveillance Cloud installer file as Administrator.
6. Click ‘Next' to continue the installation
7. Click on the checkbox to agree to the License terms and conditions, and click Next.
8. Select the appropriate VMS (Video Management System) you are using or plan to use from the list of profiles. If your VMS application is not listed here please select ‘Other'.
Important – For Milestone XProtect users, please select Milestone -XProtect to install the WSC plugin that integrates directly with Milestone.
This does not add/modify/delete any configuration on your VMS itself. This step only ensures the WSC software is optimized to work with your VMS application.
9. For Milestone XProtect VMS, the following components of WSC are available for installation. If your XProtect elements are installed on different machines, you will need to install WSC software on the appropriate server and choose the right application shown below.
For all other VMS, the following components of WSC are available for installation.
Click Install to initiate installation.
10. Click on Finish once the installation is successfully completed.
This completes the installation of Wasabi Surveillance Cloud.
Software Activation
For Milestone XProtect installations –
Wasabi Surveillance Cloud installs as a plugin within the Milestone XProtect application. Start the XProtect Management Client software, and once loaded you will notice Wasabi Surveillance Cloud in the Site Navigatio Menu at the bottom, see screenshot below –
Click on Administration to activate the software license. Enter your WSC Account Email address and Account ID, and hit OK.
If the license is successfully activated you will see the following information –
For Configuration instructions, please refer to the How do I use Milestone XProtect with Wasabi Surveillance Cloud Knowledge Base article.
For all other VMS installations –
A Configuration Wizard window pops up after successful installation. This wizard helps with quick configuration of WSC so you can begin using the app instantly.
- Email Address – Enter your WSC Account Email Address
- Account ID – Enter your WSC Account ID
- VMS Location – Click on Browse to navigate to your VMS recordings directory and select it. This will be set as the source which needs to be replicated to Wasabi.
- Region – Select the appropriate region where the server is located
- Wasabi Service URL – Based on the region selected above, the appropriate service URL is automatically selected.
- Access Key – Paste your WSC Account access key here
- Secret Key – Paste your WSC Secret key associated with the Access key here
- Bucket Name – A new bucket is created with the prepopulated name. You can change this to a different and unique bucket name. Please follow bucket naming conventions explained when you move the cursor around the question mark.
Once you have entered all the information, click Configure as shown below on the sample screenshot.
Finally, a Configuration Summary is displayed. Click Finish to close the Configuration Wizard
Wasabi Surveillance Cloud is now running and replicating data from the set source to your target Wasabi bucket.


featured articles
MEDIA & ENTERTAINMENT CASE STUDY
May 14, 2024
Boston Bruins Tap Wasabi, Data Innovation to Transf...
Boston Bruins Tap Wasabi, Data Innovation to Trans...
INDUSTRY
May 8, 2024
Key Findings from Wasabi’s 2024 Cloud Storage Index...
Key Findings from Wasabi’s 2024 Cloud Storage Inde...
TECHNOLOGY MEDIA & ENTERTAINMENT
May 2, 2024
My Vision for AI at Wasabi
My Vision for AI at Wasabi
TECHNOLOGY
April 23, 2024
Responsible AI Use: Lessons from an Industry Inside...
Responsible AI Use: Lessons from an Industry Insid...
TECH PARTNERS HEALTHCARE
April 18, 2024